Spring boot is an easy and batteries included MVC framework for Java. The best part of Spring boot is initializer, it has a vast collection of libraries that you can integrate and utilize its power to achieve or build app functionalities.
Sprint initializers can be found below
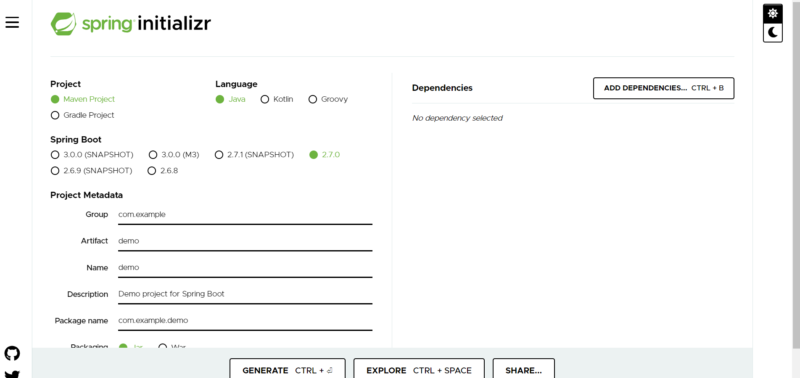
You can choose your preferred language for development along with the build tools, you can add dependencies by pressing add dependencies button.
This initializer provides you with the boilerplate code with all dependencies included.
You can open the code/project in your favorite IDE, most of the developers prefer Intelli J Idea, however, my personal preference would be VS Code with Java and Spring extensions. Both the IDEs are great it’s just a personal choice.
When you open the project, depending on the build tool it will download all the required packages in your local folder, the typical folder structure of the Spring boot is as shown below
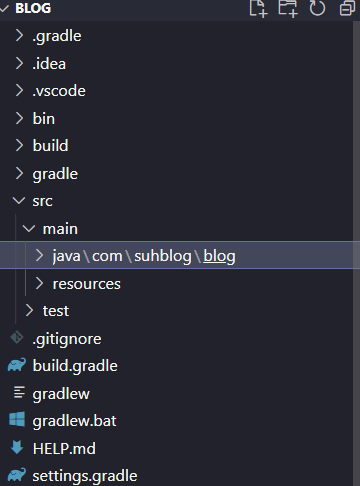
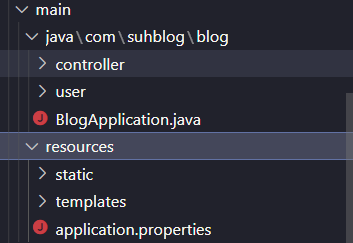
Src folder will be the main folder from the app point of view which contains folders for java and resources. The business logic of the application should be written under the Java folder and other static contents such as HTML, CSS, and JavaScript files can be placed under the resources folder as shown in the second screenshot above.
As you can see the biggest advantage of using Spring boot is developers along with project teams needs to just concentrate on the business problem and not on the infrastructure or code organization.
The developer / Application designer can decide on any of the code organization as per the need of the project, for e.g., a typical MVC style architecture or a Microservice architecture.
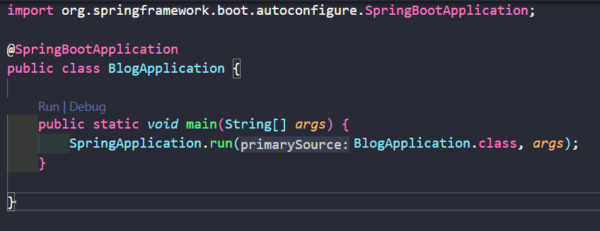
The entry point for any spring boot application is its folder name + “application” file name. It has a decorated attribute called @Springbootapplication above the main() method.
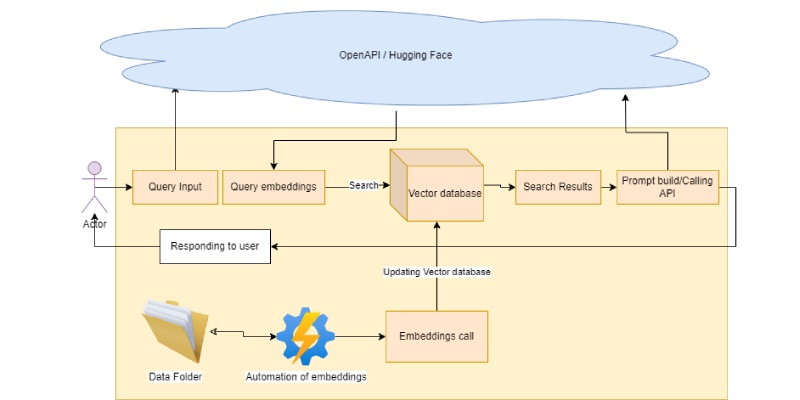
Any application requires database interaction for storing and retrieving the information in such cases database connectivity is a must. Spring boot comes with spring data JPA library which has the ability to connect to any database like Oracle, Postgres, MySQL, and MongoDB.
You can design your business model in plain Java language and annotate it beautifully to carry out certain database-level operations such as assigning primary, unique key, maintaining relationships etc.
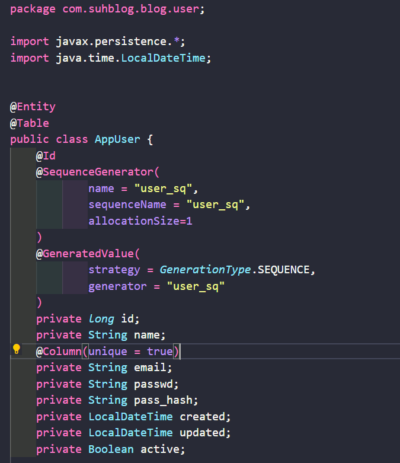
Application.properties file under the resources folder is primarily used for storing application-level parameters, like database-connection information.
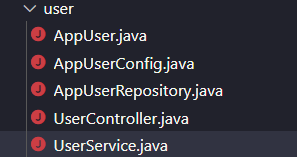
By default, JPA repositories provide a bunch of inbuilt functionalities to deal with entities, such as findAll() for getting all the records, findById() for finding specific record by Id. All you need to do is extend your interface with JPARepository.
These repositories are used to pass the data between the database and end-point or service.
Ideally, developer prefers to write services which interacts with repositories and controllers(end-point) for passing data through and from.
These services will be invoked by controllers REST calls, the below screenshot shows a detailed file structure for a module or package.
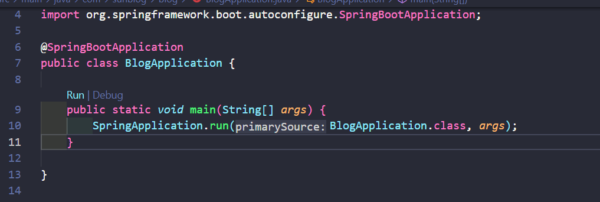
You can execute the application by using the command line or simply by clicking on Run link on main method as shown below
The application will start listening on port 8080, you can open the browser and type localhost:8080 you will see your application is running assuming you have end-point listening on it.
Stay tuned for more blogs on Spring boot.
Credit: Suhas Chitade